Features
Organize Notes
Organize your notes by moving them to Archive, Trash, or any list (folder) you create. In Settings -> Lists, you can create and organize lists (folders), such as arranging or moving into another list as needed.
Move Notes
There are two ways to move notes:
-
You can move a note by clicking the note three-dot menu and choosing 'Archive', 'Remove', or 'Move to'.
-
To move multiple notes simultaneously, click the 'Select notes' button in the top bar first. Select as many notes as you want. Then, choose 'Archive', 'Remove', or 'Move to' in the top bar or right panel.
Create a New List
Please go to Settings -> Lists to create a new list. Type a name in the text box and choose the OK (check) button. Your new list will be appended to the bottom of the others.
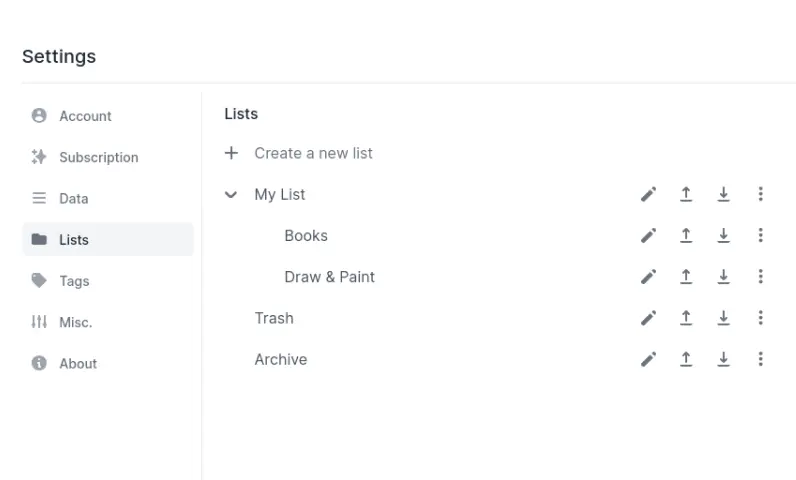
Organize Lists
Also, in Settings -> Lists, you can:
- Edit a list name by clicking on the name.
- Arrange a list name with the 'up' or 'down' button.
- Move into another list with the 'Move to' button (creating nest lists or subfolders).
- Delete a list name with the 'Delete' button.
Some buttons might be in the three-dot menu. Default lists — 'My Notes', 'Trash', and 'Archive' — can not be deleted. 'My Notes' is the default list when you share text with the mobile app. Trash is for removed notes only, and you can permanently delete them here.
Pin Notes
You can choose notes to always stay on the top of the list, a.k.a. Pin to the top. There are two ways to do it:
- On any note, please choose a three-dot button -> 'Pin to the top'.
- To pin multiple notes to the top simultaneously, click the 'Select notes' button in the top bar first. Select as many notes as you want. Then, choose 'More actions' -> 'Pin to the top' in the top bar or right panel.
To unpin notes from the top, please take similar steps but choose 'Manage pin' -> 'Unpin' instead. You can also move a pinned note up or down under the 'Manage pin'.
Tag Notes
Each note can have multiple tags. Assigning a tag to a note enables you to list notes with the same tag, providing an additional method to browse notes, similar to lists and sublists.
There are two ways to add or manage tags:
- On any note, please choose a three-dot button -> 'Add tags' or 'Manage tags'.
- To add or manage tags on multiple notes simultaneously, click the 'Select notes' button in the top bar first. Select as many notes as you want. Then, choose 'More actions' -> 'Manage tags' in the top bar or right panel.
Delete Notes
Removed notes in Trash will be automatically permanently deleted after 45 days. You can permanently delete any note in Trash immediately by:
-
Click the 'Permanently delete' button under the note three-dot menu.
-
To permanently delete multiple removed notes, click the 'Select notes' button in the top bar first. Select as many removed notes as you want. Then, choose the 'Permanently delete' button in the top bar or right panel.
Delete All Data
Please go to Settings -> Data -> Delete All Data to delete all your data, including but not limited to all your saved notes in all lists, all your created lists, and all your settings. This will only remove all your data, not your account. You will still be able to sign in.